Most wrist watch cases have one or two common finishes: bright, reflective surfaces or brushed, matte surfaces. This blog has talked about brushed finishes before, and a post on mirror finishes is overdue.
But in the meantime, we’ll talk about blasted finishes. Cases with blasted finishes have a frosted look and a satin feel. Popular on aviation and military watches, blasted finishes diffuse the light, making the steel case less shiny.
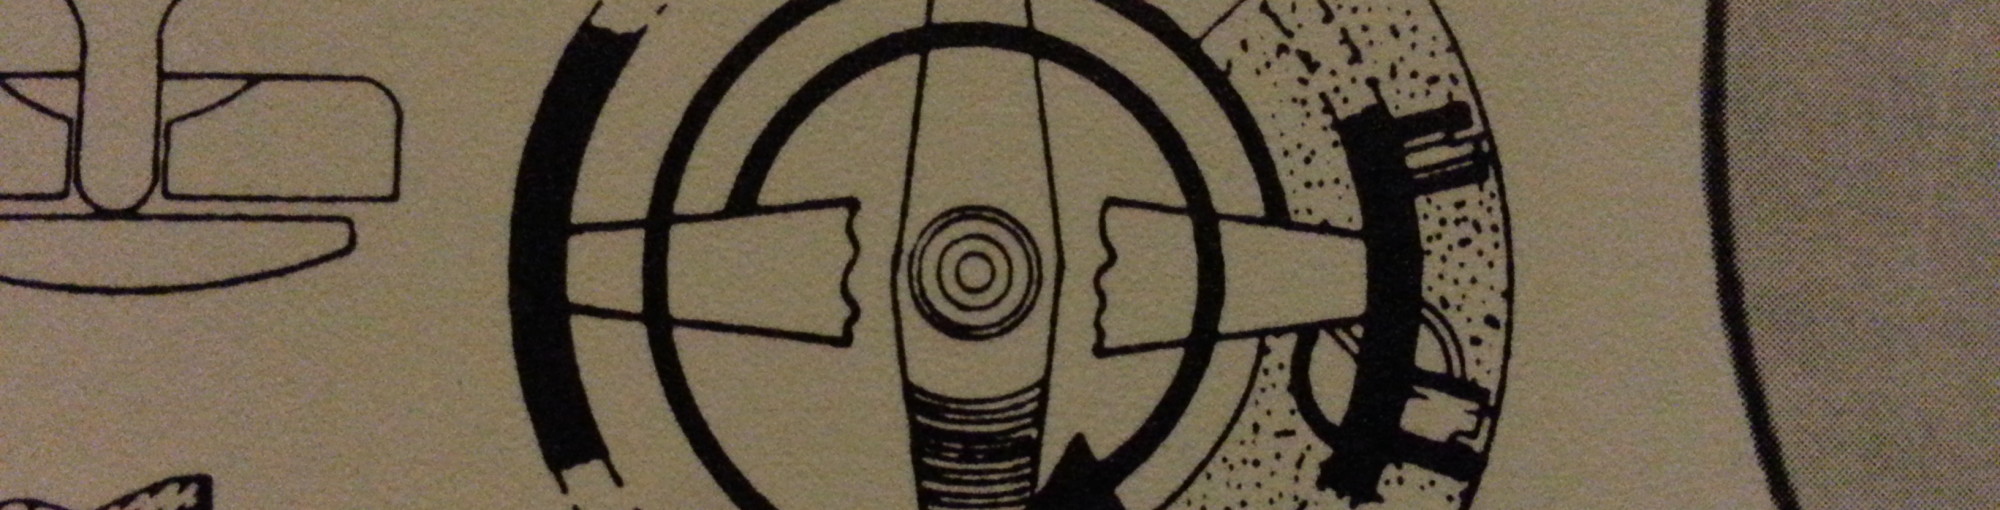
A blasted case, viewed up close, will have a pebbled or mottled appearance, like this Fortis case back.

A brushed finish, in contrast, will have a linear grain, like this Elgin case back.

Getting a Blasted Finish on Steel Watch Cases
You can get a blasted finish using…wait for it…blasting.
Nothing gives a blasted look quite like sandblasting. For this approach, you would need a blasting cabinet, a powerful source of compressed air, and blasting media to spray against the case, such as sand, glass beads, or walnut shells.
Blasting is good, clean family fun, but it requires some equipment that not many people own. Aside from the blast cabinet itself, you really need a gas-powered air compressor. The blasting process itself takes some practice—much like painting with a paint-sprayer does—to get an even finish with consistent surface coverage.
An alternative to blasting is tumbling. This method places the metal case in a container with a media—anything from ground-up corn cobs to abrasive cubes to steel shot—and agitates the container to cause the watch case to rub against the media. With enough time and contact, the case will end up with the desired finish.
Here’s a simple vibratory tumbler. It has a base with a motor that shakes a spring-mounted platform.

You attach a bowl filled with tumbling media to the top. Here’s an example of the tumbler filled with ground walnut shells.

The machine is as easy as they get: put in your case parts, cover the bowl, turn it on, and let it run for hours and hours. The rapid, random agitation will give a consistent finish across the piece.
Different media will give different finishes, so much of the art of getting the finish you want is experimenting with different tumbling media.
Our (Literal) Test Case
As a test case, we have a stainless steel Seiko case that has been the victim of many polishing experiments. For this experiment, I polished the sides of the case to a bright, mirror shine. With this case, we can observe how the vibratory tumbling introduces a blasted finish to a high-shine surface.

I also found a stainless case back from an old Elgin wrist watch. It has a deep brushed grain. I’m curious to see how much the linear grain gets knocked down.
Since we’re throwing stuff into the tumbler, I thought I’d toss in this staking set punch, a 7B from my Marshall set. The punch is grimy, corroded, and dull. Notice the brushed texture in the middle of the punch.

Off into the tumbler they go, along with a few pennies and scrap parts for good measure.
Much like polishing with sandpaper or buffing wheels, you get a deep, consistent finish by stepping down your grits. You start with a rougher grit and then shift to a finer grit. To start with, I tumbled the parts in a medium-cut abrasive media. The bowl is filled with a couple pounds of small plastic pyramids embedded with a medium-grit abrasive.
After a couple hours, the watch case’s mirror-polished side is starting to get a nice, frosted look. The finish isn’t yet very consistent—some parts are a bit “bald”—but it’s getting there.

And here’s what the parts look like after around 8 hours—messy! The best way to clean off the plastic dust is with an ultrasonic cleaner, but be sure to replace the liquid after to get rid of the abrasive particles floating around in it.

And here are the cleaned parts.

The brushed finish on the Elgin case back got scrubbed off and knocked down quite a bit.

More important, though, is the Seiko case. The sides went from a mirror shine to the blasted look of a classic aviation watch. It has a nice texture and looks great.

Stepping Down the Grit
For the next step, we’ll tumble the parts again in media with a finer grit. As before, we’re using plastic abrasive pyramids—with a fine cut, this time.
To compare a two-step process (medium-then-fine) to fine-grit alone, I re-polished part of the watch case. One side has the tumbled finish, and the other is shiny.

And it’s back to the vibratory tumbler. I tumbled the parts for around 6 hours in the fine grit abrasive media. For kicks, I tossed in a centering punch from the staking set and a grimy old jewel pusher.

The blasted finish, if I do say so myself, looks excellent. Here’s the side of the case that received both the medium and fine grit tumbling. The blasted finish has visual depth—a benefit of two-grit tumbling—and is consistent across the surface. The case has an appealing, silky texture, too.

Here’s the side of the case that received only the fine grit tumbling. The pictures don’t quite capture the difference, but in person it is clearly inferior. The finish lacks the visual depth and silky texture.

Here’s a side-by-side comparison. On top is a Fortis Flieger case with a factory blasted finish. Below is our humble Seiko that has been tumbled within an inch of sanity.

In person, both cases have an attractive frosted look. The Seiko case has more visual depth, in my opinion, and the Fortis case is more pebbled, but it is just a personal preference
By the way, the staking set punches look good, too. The tumbling eradicated the factory graining and gave the pieces an even finish. Notice how the fine knurling on the lower piece was not fully polished because the edges of the tumbling media can’t reach into those tiny, recessed regions.

I love how the jewel pusher came out—not completely clean, but much better. It is less slippery and easier to handle with a satin finish.

A Few Tips
Avoid mixing different abrasive grits in the same bowl. Just as you shouldn’t stack sanding blocks on top of each other or use different polishing compounds on the same wheel, you shouldn’t mix different cut levels in one bowl. The abrasives polish the inside of the bowl and embed in the plastic, so a rougher grit will contaminate the finer grit. (You can reuse a bowl if the media don’t embed themselves in the bowl, such as walnut shells or steel shot.)
Some tumbling media can be used wet or dry. Adding some liquid to the bowl changes the game. Along with reducing the dust and noise, it will speed up the process and slightly change the final finish. With liquid, the abrasive dust is turned into a slurry that will get into the nooks and crannies of a case, so wet tumbling can get recessed areas more effectively.