Vintage wristwatches often have “tension ring crystals,” also known as “armored crystals.” These are domed acrylic crystals with a small, beveled ring—usually gold or silver in color—at the base. The ring has aesthetic and functional purposes.
On the aesthetic side, the ring pleasingly fills the space between a case and a dial, and it adds a classy, finished look to the dial. Here’s an example from a Poljot dress watch.

Notice how the metal ring at the edge of the dial—the crystal’s tension ring—reflects the second markers at the edge of the dial. It’s a nice touch. Tension rings had a heyday in the 1940s and 1950s, especially for watches with a minute track.
For function, tension ring crystals were an early way of increasing a watch’s water resistance. Ordinary domed plastic crystals don’t seal a case well. Much like compressing a metal bezel around the outside of crystal presses it tight against the case, compressing a metal ring around the inside of the crystal will secure it tightly. If the pressure outside the watch increases, the pressure of the tension ring provides some resistance, keeping the case tight under pressure. If the case tube and back were screwed down with the proper gaskets, you could get respectable water resistance with a tension ring system. These days, of course, dive watches use thick glass crystals with beefy gaskets, so tension ring crystals are mostly for aesthetic value.
The most common kinds of tension ring crystals here in the USA are the Stella WRA series and the GS “Evr-Tite” ET series; Sternkreuz makes quality ones, too, including tension ring crystals with cyclops eyes. To select a size, pick a diameter no more than 1 mm larger than the case opening. The crystal should measure slightly bigger than the opening, but not by much.

Because of the force needed to compress a tension ring crystal, they get removed and inserted with different methods. As an example, we’ll use our Poljot as our patient. It has a yellow tension ring crystal that’s accumulated some scuffs and scrapes, and I’d like to replace it with a crystal with a silver-colored ring.

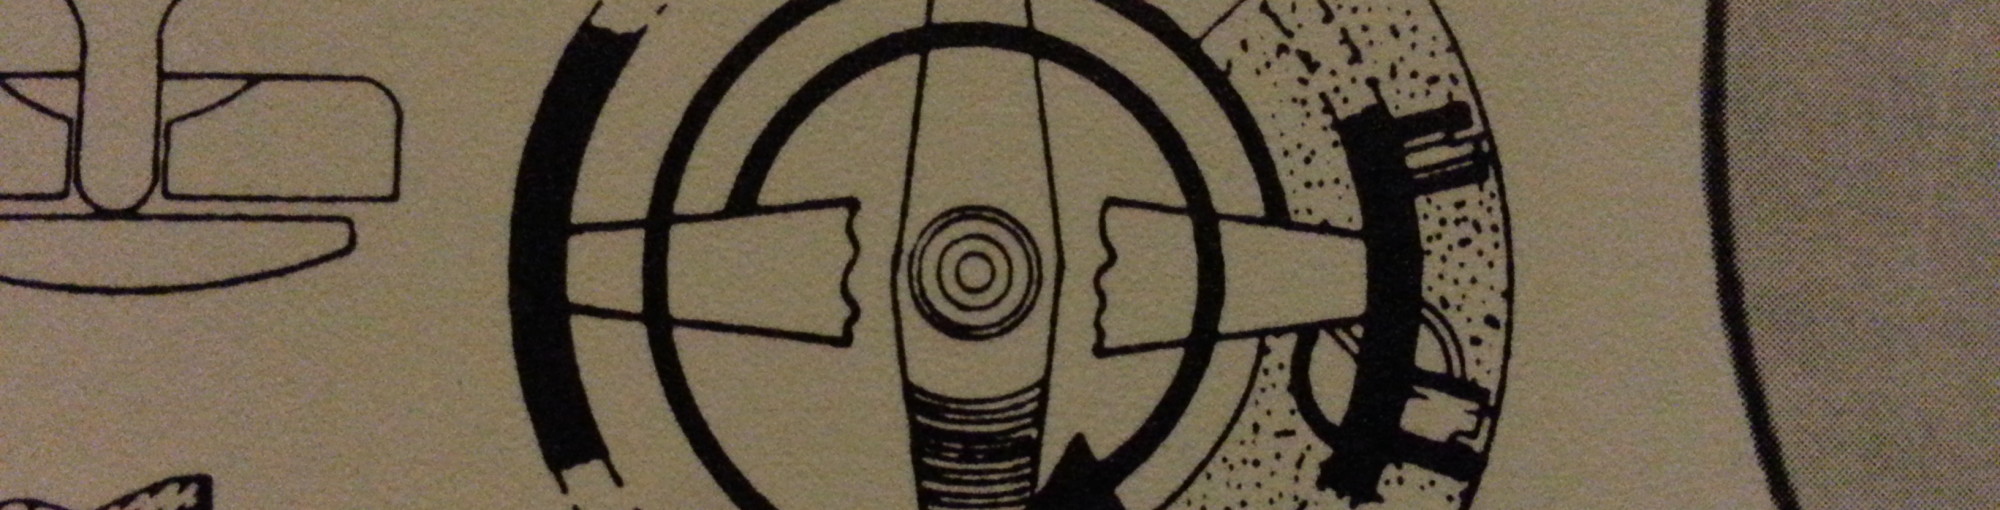
To remove the crystal without taking apart the case, we can use our trusty crystal lift. These are infernal looking tools.

Simply twist the tool until the pincers are slightly larger in diameter than the crystal. Place the pincers on the bezel, twist the tool to grip and compress the crystal, and then lift the crystal away.

A crystal lift tool is a convenient way to avoid the hassle of removing the movement and forcing the crystal out from inside the case.
In this picture, notice the gap between the edge of the dial and the case. Likewise, notice how the ticks are not quite at the edge of the dial. These are signs that the watch was designed to have a thin tension ring that would fill the gap without overlapping the tick marks.

To insert a new crystal, you could use the crystal lift to grab the edges of the new crystal, compress it, and then insert it into position. I prefer, though, to use a crystal press with tension ring dies. The crystal lift can mar the sides of the crystal, even though it shouldn’t, and I feel like I get more consistent and cleaner results with the crystal press.
When using a crystal press, you need tapered dies designed for tension ring crystals.

Unlike dies for case backs and bezels, which have a straight wall, the walls of the tension ring dies are tapered to gradually compress the side of the crystal inward.

Other than selecting a tapered die, it’s the same process with the crystal lift.

And there we have it—a quick and simple operation that greatly improves the look of a vintage watch.