The pawn shop Rolex needs a thorough cleaning, so I’ll start with the Oyster bracelet. It comes off easily by removing the spring bars at the lugs.

Before polishing something, it helps to think through your approach to the piece. For this bracelet, my main goals are:
- to clean off the gunky paste of “man jam” that had built up in the crevices
- to give it a “30-year-old watch in nice shape” look, not a “showroom new” look.
So instead of polishing away every last scratch and nick, I’ll aim to buff away the most salient scratches, brighten up the bracelet, and refresh the “polished sides, brushed top” look. This will avoid reshaping some of the links. An older watch should show some signs of age, I think.
Another goal is to tighten up the bracelet. Overall, this is in good shape, but the clasp is loose and has too much play. This play will strain the links over time and cause the bracelet to flex.
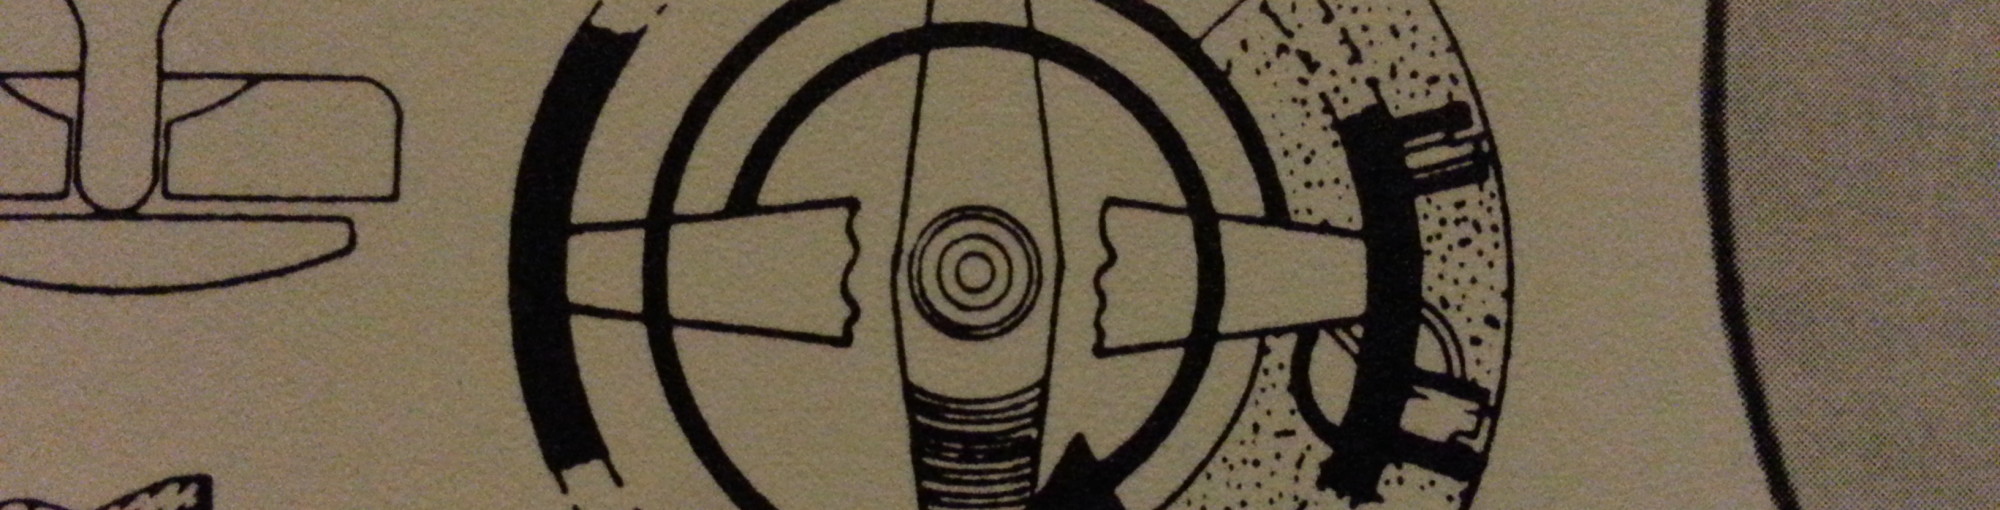
Replacing the pins is an easy way to firm up a bracelet. This Oyster has 2 pins and one spring bar. The pins are heavily worn.

Over the years, the clasp and link end have ground away the pins, so the clasp wiggles around too much. This, in turn, can strain the links. Even worse, a loose pin can slip out, causing the bracelet to fall apart. One of these pins was almost that loose—it flew out after a small poke.

The old pin is on the bottom; a new one is on top. Over half the pin’s diameter has been ground down at its thinnest point.

I’ll keep the old pins and spring bar because some Rolex fans are obsessed with stuff like that, and I’m not sure if I’ll keep this watch.
The first step is cleaning in a heated ultrasonic cleaner. For gunky stainless steel, I like to use Simple Green cleaner diluted with water 1:1. After a few minutes, all the pieces look much better.
The next step is to lightly polish the links. This will brighten up the metal, even out the surface for later brushing, and mute the most obvious scratches. For this, I used a stitched cotton wheel with Menzerna’s “Pink” compound (P126). This stuff is hard to find in the USA, but Cousins UK offers it.

This compound has a light cut, so it will primarily brighten the steel. The Pink P126 is a good compound for steel that is in good shape.
The sides of the oyster bracelet and clasp are mirror polished. A felt wheel is used for tasks like this. It will keep the side flat and the edges crisp.
I used a 4″ soft felt wheel with the Pink P126 compound. The sides were in great shape, so I could skip the coarser compounds. You simply present it to the wheel like this:

I didn’t polish the sides further, but for an extremely bright shine, you could finish with Menzerna’s Yellow P175 and then White M5. The sides of the clasp get mirror polished on the felt wheel, too.
At this point, all the parts get cleaned in the ultrasonic to remove the gunk and fibers and paste from the polishing. And then it’s time for the brushed finish. I used this 4″ satin wheel to give the bracelet and clasp a brushed finish. It’s a very fine grained wheel, so it gives stainless steel a nice sheen without deep grain marks.

The wheel works best at slower speeds. The idea is basically easy: just present each link individually for the same number of strokes. Then reverse the piece 180 degrees and brush each link again in the other direction, which ensures a smooth, consistent grain.

If you present the metal flat to the wheel consistently and don’t apply too much pressure, the mirror-polished sides won’t get scratched or scuffed.
After another round of ultrasonic cleaning and drying, here’s what we ended up with.

It looks good. The brushing has an even, consistent grain, and the sides are bright and shiny.

The polishing didn’t remove every last nick and scratch, but my aim was to lightly refresh the bracelet without grinding away at the links.
After it dried, the full bracelet was reassembled with new spring bars and pins. (The two pins were 15 mm by 1 mm, and the spring bar was 16 mm by 1.5 mm, if you’re curious.)
I’m happy with how it turned out.

Ironically, perhaps, all this effort was for nought. I strongly prefer leather straps over metal bracelets, so I’m going to store this oyster bracelet safely somewhere.