One of the nicer watches in my stash of “fix someday” watches is this old Waltham pocket watch. I picked it up for a good price some years back at a small antique shop in the bustling metropolis of Asheboro, NC, but I never got around to cleaning it.

It’s a Waltham 1883, an iconic 18-size pocket watch that was made in many grades, styles, and finishes over several decades. This is one of the nicer examples: a 17-jeweled Grade 825 model, probably made in 1912. It has a bright and attractive finish.

The watch is in much nicer shape than the usual pocket watches I work on. It looks clean and cared for.
The double-sunk porcelain enamel dial is pristine and flawless, but a bit grimy.

The back of the dial looks nice, too.

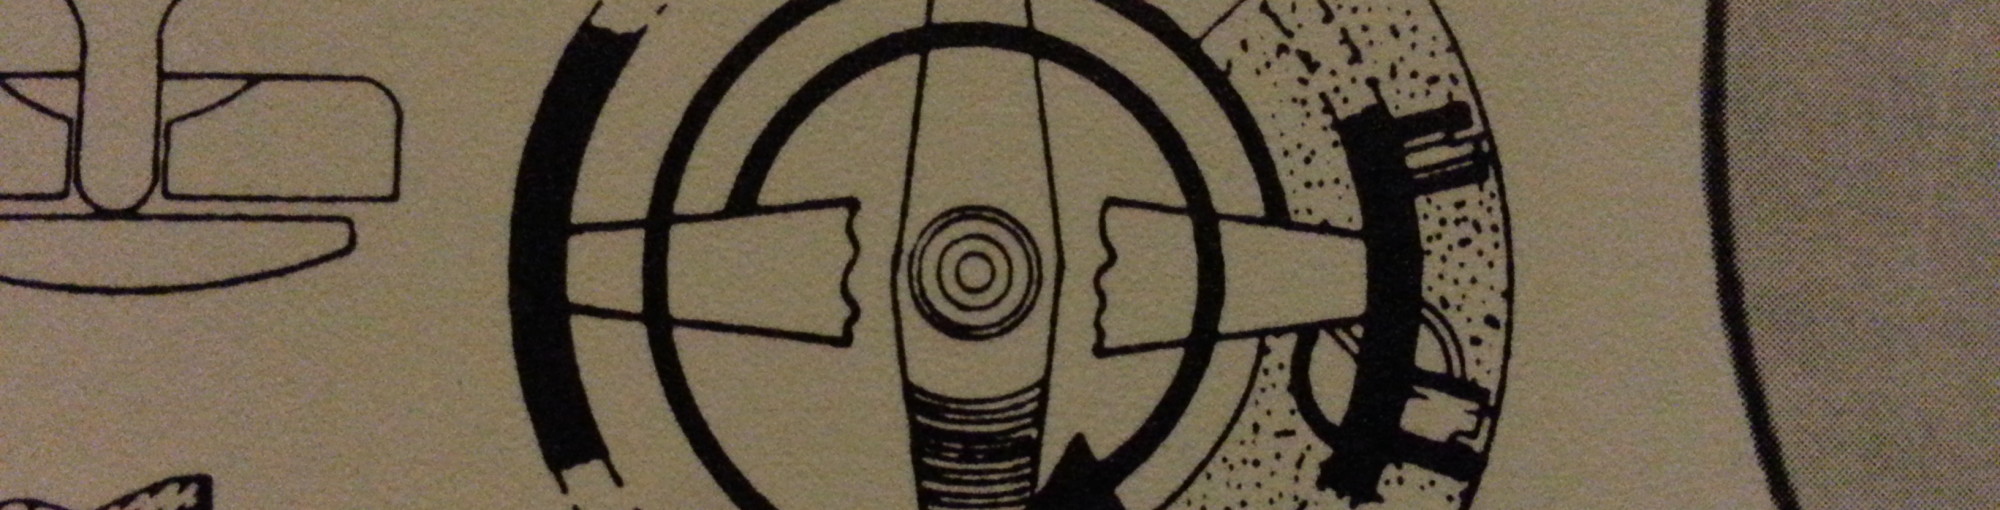
After working on several crusty and oily movements, it’s nice to work on something clean, aside from some green goo on the gears. The machining of the teeth and pinions is much finer on these later 1883s, so they can attain better timekeeping than the ones from the early model years. The old-style pallet fork looks quaint.

This is a pendant-wind, pendant-set open-face movement. The keyless works are compact and robust, with relatively few fiddly springs and tiny screws.

It looks like a screw is missing. The screw head covers the click spring and keeps it from wriggling way, so it will need to be replaced. If this is a watch’s only flaw, I’ll count myself lucky.

Adjusting the Movement
The movement cleaned up nicely and ticked back to life when reassembled. Many of the parts were magnetized—the regulator arm kept attracting all the jewel screws in the parts tray—so it got demagnetized within an inch of its life and left to run for a couple days.
Before adjusting the watch, as always, we ponder the good and bad omens to set realistic accuracy goals.
On the good side, this is a nice watch—it has 17 jewels, is in good condition, and comes from a good period in Waltham’s history. The balance has an overcoil hairspring and timing screws, which are always good signs. And the watch has clearly been cared for and serviced within the past 50 years.
On the bad side, these full-plate models are irksome to work on. It is hard to observe the behavior of the escapement for these old models.
In short, I’ll aim to adjust it to at least 3 positions without removing weight. For these full plate watches, where the big balance wheel is the only thing to see, the aesthetic and cosmetic aspect of adjusting is more important. I’ll see what I can do by only adding timing washers.
 Here are the “Time 0” initial rates when the watch was fully wound (i.e., around 30-60 minutes after being fully wound).
Overall, this is pretty good. The biggest difference between the 4 vertical positions is 31 seconds. The two positions we want to be close—dial-up and pendant-up—are only 14 seconds apart. And the rates are stable, the timing traces are clean, and the amplitude is good enough (but not huge)—we can work with this.
To adjust the watch to positions, we need to improve the poise of the balance wheel. By running the watch at low amplitude (around 140 degrees) and measuring the rates in all 8 vertical positions, we can identify the heaviest spot on the balance wheel. (Our series on dynamic poising probably has more than you want to know about the process.)
For this movement, the watch ran fastest in this vertical position. The heavy spot is directly below the balance wheel, so the light spot is opposite it. The red stick is pointing to the screw at the location of the light spot—here’s where we’ll stick a timing washer. The watch is running fast, so adding weight to the light spot will slow down the movement and improve the wheel’s poise at the same time.

And it looks like we got lucky—here are the rates after our one round of adjusting.
 The 3 positions—dial-up, dial-down, and pendant-up—are all close and within 8 seconds of each other. No position is more than 14 seconds from zero, and they are all reasonably similar for a full-plate, 18-size 1883.
I think I’ll call it here. The watch was probably adjusted to 3 positions at the factory—dial up, dial down, and pendant up—and it shows excellent accuracy in those positions now. At this point, further improvements would require fine-tuning by removing small amounts of weight, so it’s a good stopping point. I’ll tweak the regulator to set it a couple seconds faster and call it a day.
Cleaning the Case
This watch has a gold-filled case that, like most old gold-filled cases, shows a lot of wear.

The “brassing” on the case, bow, and pendant stem is significant. Weirdly, the crown is silver-colored, so it doesn’t match the case.

Time to explore the stash of crowns to find something more suitable.

The watch came with a scratched and scuffed plastic crystal. I happen to have a vintage glass crystal that is a perfect fit.

For gold-filled cases with significant wear, the best thing to do is to get them extremely clean and then apply glossy finish. The brass and gold react to the air at different rates, so the brass will start to get dull and dark before the gold. But when clean and shiny, brass and gold look more similar, and it’s harder for the human eye to draw color distinctions for highly glossy materials. Over time, of course, the contrast between the brass and gold will re-emerge, so the only permanent fix would be gold-plating the case.
After some quality time with the heated ultrasonic cleaner and the light Menzerna polishing compounds, the case looks pretty respectable, but it would be worth replacing the bow someday.

Wrapping Up
And here we have it: looking sharp and keeping great time.

So long as a watch has stable rates, you can almost always adjust it to keep better time across positions than it did before. While it’s always satisfying to nail down all 6 positions, for many watches it’s sensible to focus on the 2 or 3 most common positions so that the watch keeps good time in use.